The Playwright test runner
Learn how to give your test suite some structure.
So far, we've only looked at the internals of a test run. But how can you control when and how your tests are run?
test / test.describe
Suppose your test files grow, you can always introduce a clean grouping using test.describe.
const { test, expect } = require("@playwright/test");

test.describe("playwright", () => {
  test("has title", async ({ page }) => {
    // ...
  });

  test("get started link", async ({ page, browserName }) => {
    // ...
  });
});
beforeAll, beforeEach, afterEach, afterAll
Playwright provides common test runner methods your might be already familiar with.
const { test, expect } = require("@playwright/test");

test.describe("playwright", () => {
  test.beforeAll(async () => {
    console.log("Before tests");
  });

  test.beforeEach(async ({ page }) => {
    console.log("Before each");
  });

  test("has title", async ({ page }) => {
    // ...
  });

  test("get started link", async ({ page, browserName }) => {
    // ...
  });

  test.afterEach(async ({ page }) => {
    console.log("After each");
  });

  test.afterAll(async () => {
    console.log("After tests");
  });
});
Fixtures such as page are isolated per test but keep their state in life cycle hooks such as beforeEach and afterEach. For example, you can log into a website in a beforeEach hook and all following tests will access encapsulated but logged in page objects.
Even though you might be used to beforeEach and afterEach, custom fixtures
are a handy alternative to structure tests and provide similar functionality
across files.
More on that later...
Individual test configuration
When Playwright runs all your tests, there are multiple ways to configure single test runs.
test.only
If you're focusing on a single test during development you can task the test runner to only run a single test.
test.only("focus this test", async ({ page }) => {
  // Run only focused tests in the entire project.
});
test.only is valuable in debugging sessions to only run and debug a single test.
test.fixme
Don't run tests but mark them as fixme to look at them later.
// skip an entire test and mark it as `fixme`
test.fixme("test to be fixed", async ({ page }) => {
  // ...
});

// skip test depending on a condition and mark it as `fixme`
test("broken in WebKit", async ({ page, browserName }) => {
  test.fixme(
    browserName === "webkit",
    "This feature is not implemented on Mac yet",
  );
  // ...
});
test.slow
Mark a test as slow and tripple the auto-waiting timeouts.
test("has title", async ({ page, browserName }) => {
  test.slow(browserName === "webkit", "This feature is slow on Mac");
  // ...
});
test.skip
Skip a test.
// skip test entirely
test.skip("broken test", async ({ page }) => {
  // ...
});

// skip test when it's run in webkit
test("skip in WebKit", async ({ page, browserName }) => {
  test.skip(
    browserName === "webkit",
    "This feature is not implemented for Mac",
  );
  // ...
});
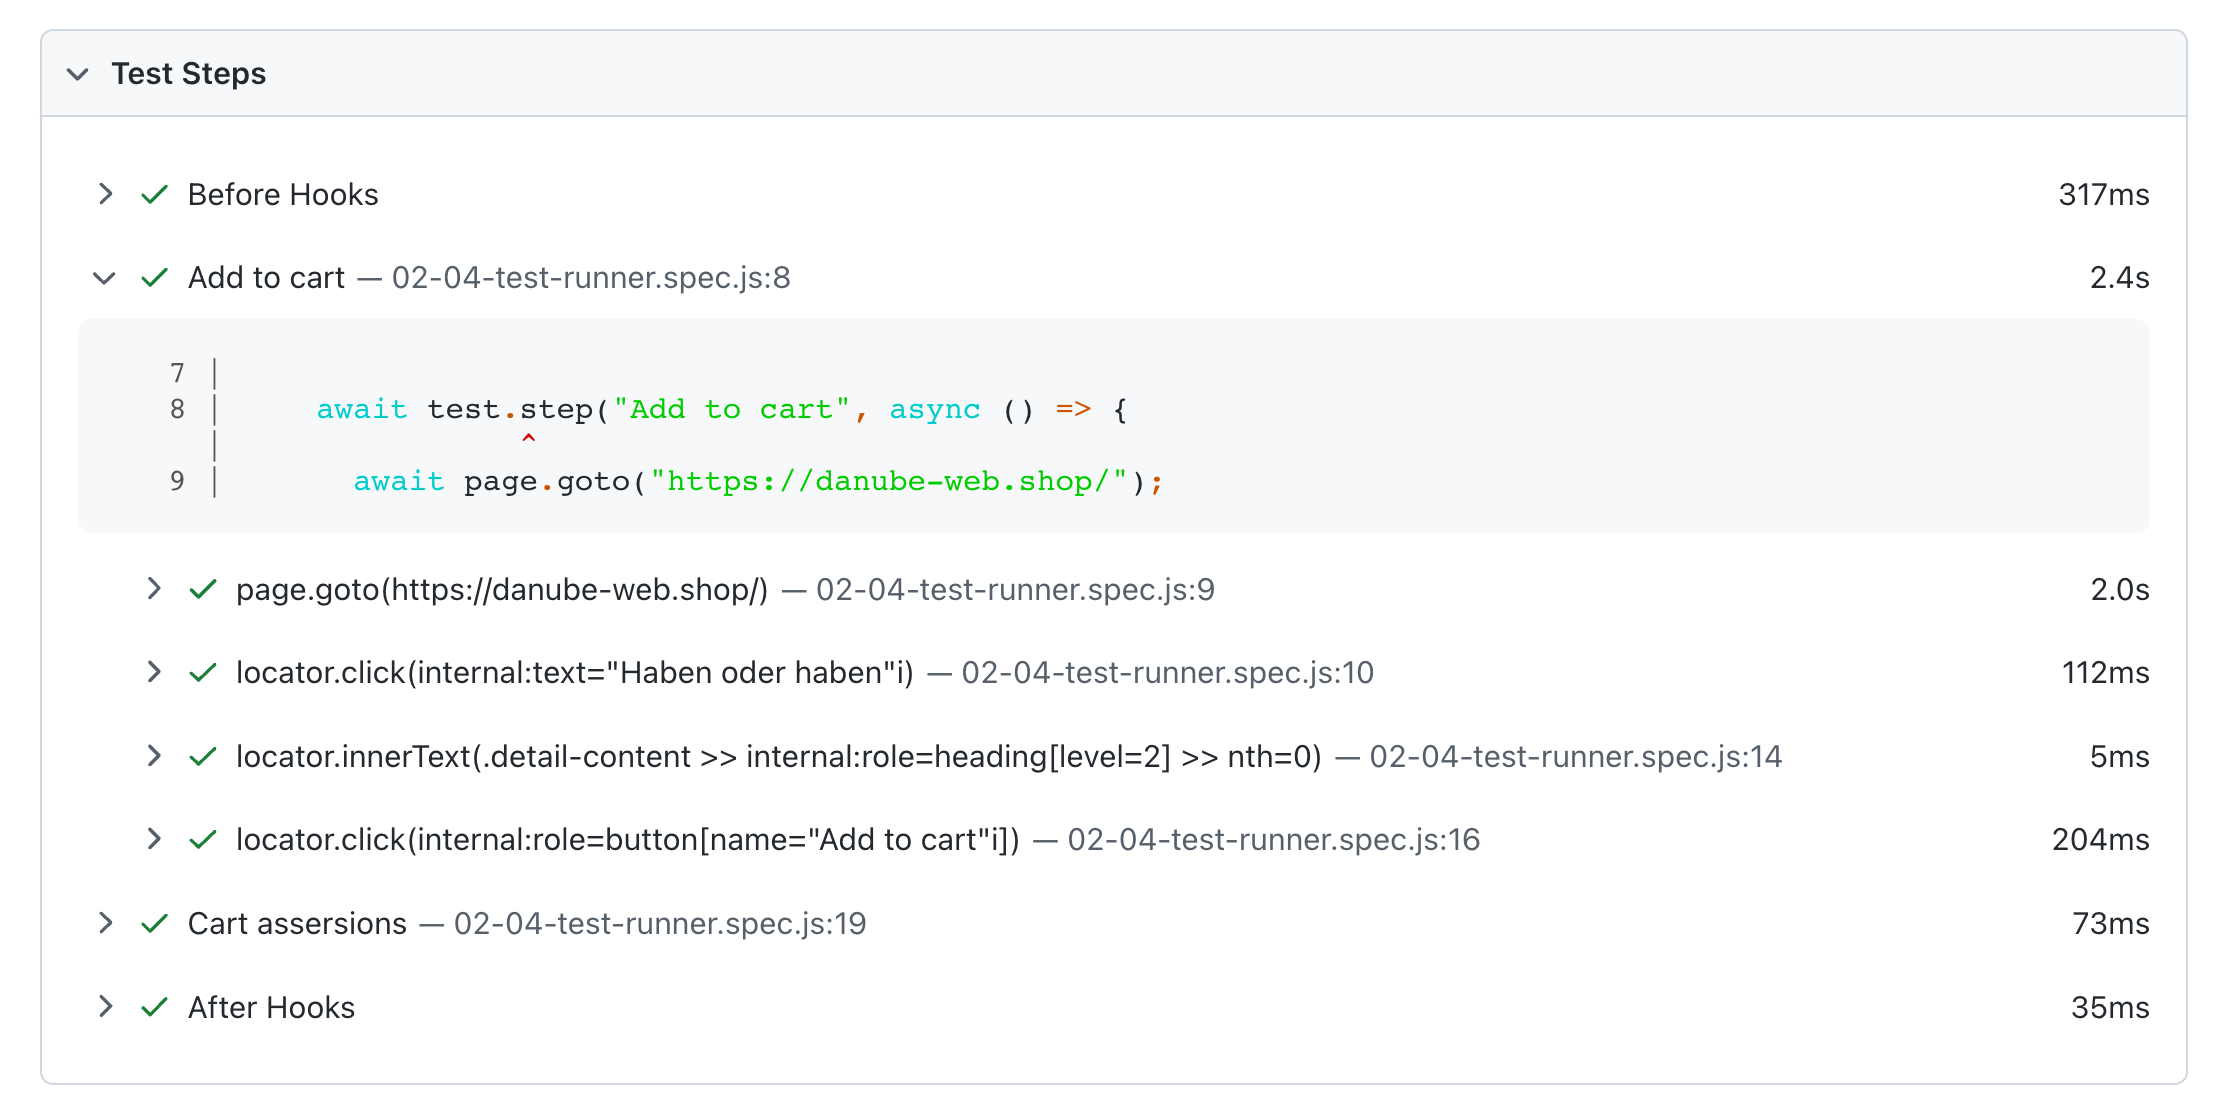
Test steps
For longer and more complex tests, it might be valuable to add a third level of grouping - groups, tests and test steps.
test.describe("danube tests", () => {
  test("attach stuff to your test reports", async ({ page }, testInfo) => {
    let productName;

    // add a test step for additional grouping in your HTML report
    await test.step("Add to cart", async () => {
      await page.goto("https://danube-web.shop/");
      await page.getByText("Haben oder haben").click();

      const detailContainer = page.locator(".detail-content");
      const productHeading = detailContainer.getByRole("heading", { level: 2 });
      productName = await productHeading.first().innerText();

      await page.getByRole("button", { name: "Add to cart" }).click();
    });
  });
});
Test steps are a nice way to make your test reports more readable.
Test information
Additionally to the handy test methods you can also access and enrich the gathered test information using the testInfo.
Custom annotations
fixme or slow tests will be annotated with their particular labels.

It's also possible to add your own annotations to the test report.
test("is logged in", async ({ loggedInPage }, testInfo) => {
  testInfo.annotations.push({
    type: "Some thing is a 🐟y here",
    description: "https://some-url.com",
  });
  // ...
});
Custom annotations can be valuable if you want to reference or link to other materials.

💡 If you're stuck, find a working example on GitHub.